Managing customer questions through a cluttered email inbox slows down your team. Many website owners avoid upgrading to real-time communication because they assume the technical setup requires a developer. But what they don’t know is you do not need coding skills to make this switch. Today, we will fill you in on the details of exactly how to add live chat to a website, covering the specific steps to configure one for yourself on an agent dashboard.
So without further ado, let’s begin.
What Is a Live Chat Widget?
A live chat widget is a text interface sitting at the bottom right corner of a webpage that connects visitors directly to your staff. Most businesses overestimate how many conversations should remain fully AI-driven by building complex menus and robotic auto-responders. We have found that forcing users through automation loops damages trust faster than long wait times. A report published on gartner.com confirms organizations prioritizing direct human contact see higher customer satisfaction scores.
Why Every Website Needs Live Chat?
People refuse to dial phone numbers or wait hours for email replies when they want answers about return policies or shipping costs. Research from mckinsey.com shows digital-first customer service models reduce overall support costs, while data from statista.com confirms unexpected costs cause the most checkout abandonment. B2B companies use these exact tools to qualify leads directly from their pricing pages, a tactic a hubspot.com study proves increases sales conversion rates. Consumer expectations have shifted entirely; capgemini.com points out modern shoppers expect instant text-based support, and superoffice.com data verifies chat resolves issues faster than traditional phone support.
How Live Chat Works?
A tiny snippet of tracking code downloads when a user loads your homepage, requesting the full application from the provider’s servers to check your operating hours. When a visitor types a message, the text travels through a secure WebSocket connection to your agent console, bypassing the need for a page refresh. The system checks which staff member has the fewest active conversations and assigns the request instantly. Documentation from twilio.com explains how these secure connections prevent outside parties from intercepting text exchanges between browsers and servers.
Step-by-Step Guide to Adding Live Chat
Adding a communication tool to your site does not require a developer.
You can complete the process in a few minutes using a specialized platform. Here is the exact process for configuring the system and getting it live on your pages.
Choose a Live Chat Platform
Your first task is selecting the right software provider. The market offers hundreds of options. Some focus heavily on complex ticketing systems, while others prioritize simple, fast conversations. You need a platform that matches your team’s technical skills and your budget.
Look for a tool that offers direct integration with your existing website builder. It should provide customizable operating hours, an easy-to-use agent dashboard, and clear routing rules.
With SupportSuite247, you can get everything under a single umbrella. It offers a straightforward campaign builder and many interesting features.
Create an Account
Go to the provider’s website and register for an account.
You will need to provide your company name, a business email address, and a secure password. After verifying your email, sign in to your dashboard.
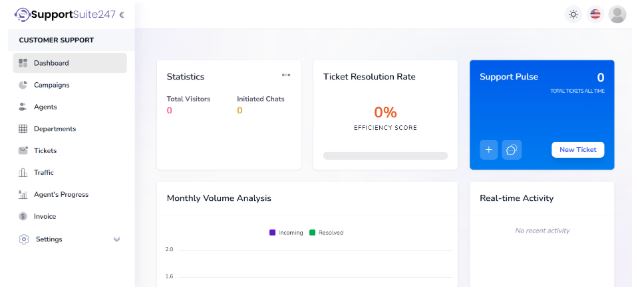
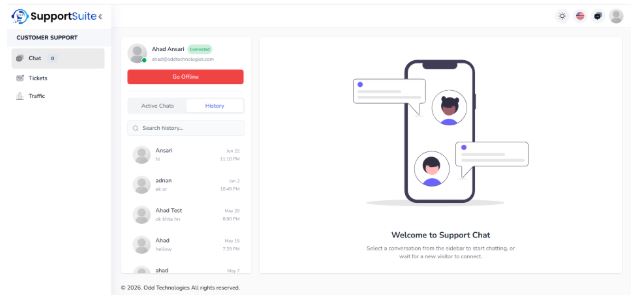
The dashboard is your central command station.
From here, you will control everything your visitors see.
To start a campaign and begin with your first agent, you will first have to create that agent profile. Navigate to the “Agents” option from the main menu on the left side of the screen.
Click on “Agents” to open the agent management screen.
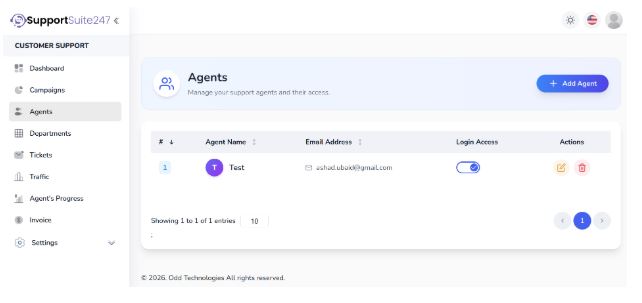
Click on the “+ Add Agent” button. The system will prompt you for details.
You will need to add the agent’s name and their email address.
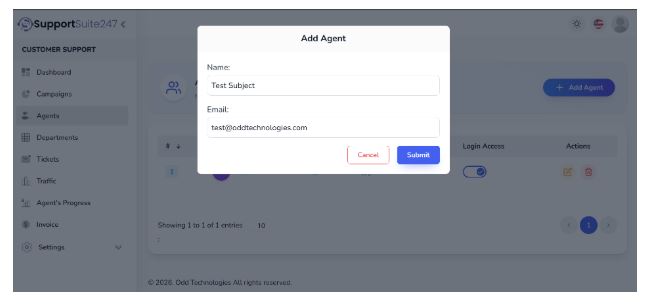
Once done, press the “Submit” button. It will create your first agent profile.
This person will now be able to log in and answer incoming questions.
Customize Your Widget
With your agent ready, you must define how the chat box looks and behaves on your website. Go back to the dashboard screen and select “Campaigns” from the menu.
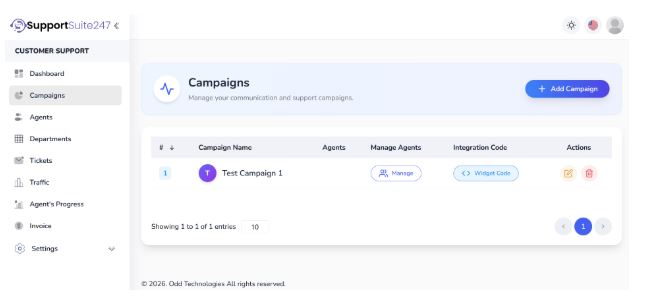
Click on “+ Add Campaign” to start a new setup for your agent.
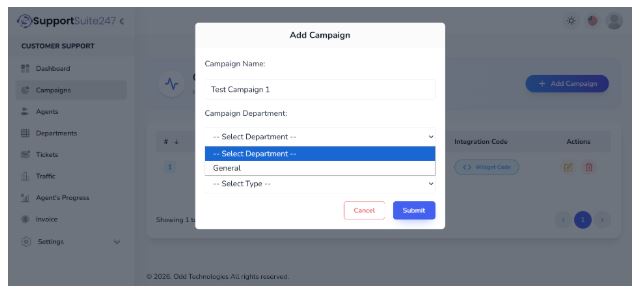
Add your desired campaign name in the text field. Set the Campaign Department to “General”. It will categorize the types of questions this widget will handle.
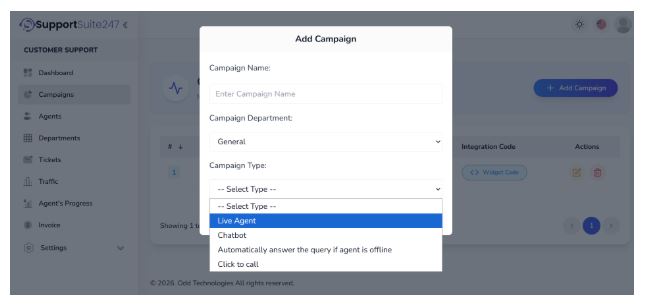
Next, you must select the type of agent you want to build.
Click on the Campaign Type section. Choose “Live Agent” from the drop-down menu.
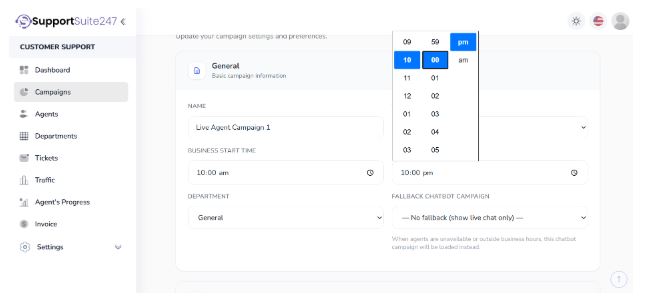
You will be required to set your business time.
Set the Business Start Time and Business Close Time. Scheduling ensures the widget only shows as “online” when someone is actually sitting at the computer ready to help. If someone visits outside these hours, the widget will switch to an offline state or hide completely.
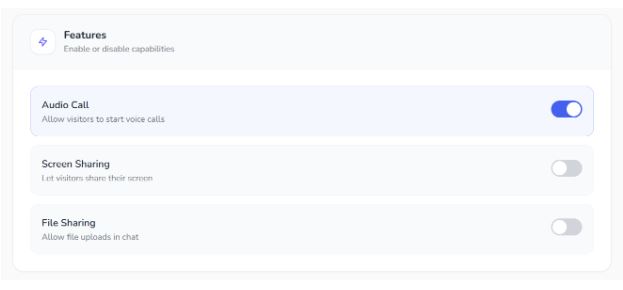
From the Features section, you can toggle what capabilities you want the agent to have.
In our scenario, we have turned on Audio Calls. It allows a text conversation to switch to a voice call directly through the browser if a problem is too complex to type out.
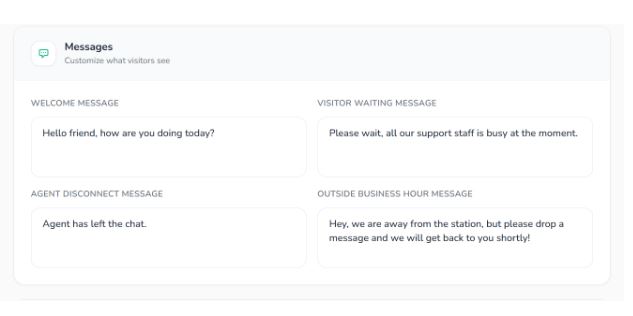
Next, set your custom messages based on how you want your agent to interact. You can define the initial greeting message that pops up when a user clicks the icon.
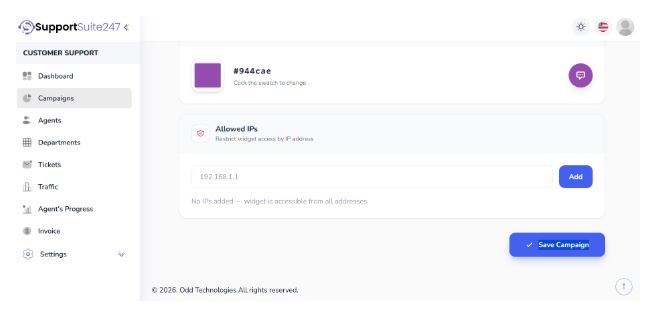
Finally, set the widget color. Pick a hex code that matches your brand guidelines.
If there are any IP addresses you want to restrict from using the service, you can add them to the blocklist here. Once the process is complete, simply hit “Save Campaign” and your configuration will be stored.
Install the Tracking Code
Your campaign is ready. You now need to connect it to your website. Click on the “Widget Code” button from the Integration Code section in your dashboard.
![]()
The system will pop up a snippet of HTML and JavaScript for you.
Just copy this tracking code.
Open your website’s content management system or your raw HTML files. You need to paste this code just before the closing </body> tag on every page where you want the chat box to appear. If you use WordPress, you can use a header and footer plugin to insert the script across your entire site at once. If you use Shopify, you can paste the script into your theme’s theme.liquid file.
Test the Widget
Never assume the installation worked perfectly on the first try.
Navigate to the public-facing side of your website. Check the bottom right corner of the screen. You should see the icon you configured.
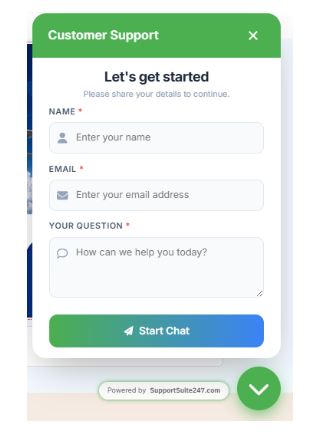
Click the icon. The chat window should open and display “Let’s get started.” Now enter your Name, email and your question. Type the message and press “Start Chat.”
Open a second browser window and log in to your agent dashboard. You should hear a notification sound and see your test message appear in the queue.
Reply to the message from the dashboard.
Go back to your website view and verify whether the reply arrived instantly or not.
Train Your Team
Software alone will not solve customer problems.
You must prepare the people operating the dashboard. Many companies waste thousands of dollars treating live chat like a lead generation form instead of a conversation channel.
Teach your agents to use a conversational tone. They should not use rigid corporate scripts. They need to answer questions directly and clearly. Speed is the primary metric here.
Instruct your team on how to handle multiple concurrent chats.
A skilled agent can manage three to four conversations at once. They must learn how to use saved replies for common questions about pricing or shipping times. They must also know exactly when to escalate a frustrated user to a phone call or a senior manager.
Harsh Realities of Customer Behavior
Building and deploying communication tools over the years has taught us several harsh realities about customer behavior.
First, fake typing indicators annoy users. Early in our development, we thought adding a delay and a “typing…” animation to automated greetings would make the system feel natural. We were wrong. Users know it is a machine. They felt we were wasting their time. We removed the artificial delays. Transparency always wins.
Second, forced email capture ruins the experience. We tested requiring visitors to enter their email address before they could ask a single question. Conversion rates dropped immediately. People want answers before they hand over personal data. We learned to let users start talking anonymously. The agent can ask for an email address naturally during the conversation if they need to follow up later.
Third, overwhelming agents leads to poor service. We initially allowed the routing engine to assign up to seven active chats to a single person. The agents could not keep up. Responses became slow and full of typos. The customers grew angry. We capped the maximum concurrent chats at four. And eventually we saw quality improve instantly.
A study from bain.com details the economic value of retaining customers through high-quality service. Pushing your agents past their cognitive limits guarantees low quality service and higher customer churn.
Common Live Chat Installation Mistakes
Many website owners fail during the technical setup or the initial configuration phase. Avoiding these errors saves time and prevents lost sales.
Ignoring the Mobile Experience: More than half of all web traffic comes from smartphones. If your widget looks great on a desktop monitor but covers the entire screen on a phone, users will leave. You must test the interface on actual mobile devices. Ensure the close button is easily clickable with a thumb.
Hiding the Widget Behind Other Elements: Modern websites use sticky headers, cookie consent banners, and scroll-to-top buttons. If your chat icon sits in the exact same corner as a cookie banner, the user cannot click it. You must adjust the CSS positioning of your widget to ensure it does not overlap with other functional elements on your page.
Failing to Set Offline Hours: Leaving the system marked as “online” when your team is asleep creates a terrible experience. A user will type a question, wait ten minutes, and leave in frustration. Always configure your business hours accurately. The widget should switch to an offline contact form when no one is available. A report on zendesk.com shows that unresolved wait times are the leading cause of customer service complaints.
Using Generic Greetings: A message saying “Hello, how can I help you?” is boring. It does not engage the user. Contextual greetings work better. If a user is on the pricing page, the greeting should say, “Do you have any questions about our subscription plans?”
Placing the Code in the Wrong Spot: Pasting the JavaScript inside the <head> of your website can delay the loading of your main content. Browsers read code from top to bottom. If the chat script takes time to load, the rest of your page must wait. Always place the snippet just before the closing </body> tag so the visual elements of your site load first.
Best Practices for Live Chat Setup
A successful implementation goes beyond pasting code. You need operational rules to maintain quality over time.
Establish a Clear Escalation Path: Chat agents cannot solve every problem. Sometimes a technical issue requires a developer. Sometimes a billing dispute requires a manager. Give your agents a documented process for transferring conversations. If you integrate audio calls in your SupportSuite247 setup, train the team to say, “This is complex. Can I call you right now through the browser?”
Monitor Chat Transcripts Weekly: Do not leave your agents isolated. Managers should read past conversations every week. This review helps identify common customer confusions. If ten people ask the exact same question about a product feature in one week, your website copy needs an update.
Keep Responses Short: Text communication should resemble a quick text message to a friend. Do not send massive paragraphs. Break information down into single sentences. If you need to explain a long process, send a link to a knowledge base article instead of typing out twenty steps. An article on salesforce.com indicates that B2B buyers prefer fast, digestible answers over lengthy technical explanations.
Be Honest About Wait Times: If your team is experiencing a high volume of requests, tell the user immediately. An automated message saying, “We are currently helping other customers. Wait time is approximately 4 minutes,” sets the right expectation. Honesty prevents the user from assuming the system is broken. Research from nielsen.com shows that transparency is the fastest way to build trust in digital environments.
Use Real Names and Photos: Do not use a generic company logo as the agent avatar. Do not use fake names like “Support Bot.” People want to talk to people. Ask your team to upload professional headshots. Seeing a real human face calms frustrated customers down. Data from hbr.org details how humanizing the service interaction reduces aggressive customer behavior.
Why Do Businesses Choose SupportSuite247?
Finding the right balance between features and simplicity is difficult. Many enterprise tools take months to deploy. They require dedicated consultants to map out complex routing rules.
Small and medium businesses do not have that kind of time.
Companies prefer SupportSuite247 because it strips away unnecessary complexity. The dashboard focuses on getting a person online and talking to customers as fast as possible. You create an agent, define a campaign, and grab the code.
The entire deployment takes less than a few minutes.
Furthermore, the system does not require heavy technical maintenance. JavaScript is lightweight. It will not damage your website’s core web vitals or slow down your page speeds. It runs silently in the background until a user needs it.
Brands looking to implement conversational marketing rely on this speed. Insights from drift.com suggest that reducing the friction between a buyer’s question and a company’s answer directly correlates to revenue growth. SupportSuite247 removes that friction entirely.
Conclusion
Installing a communication widget on your site is an easy to perform technical task.
You choose a provider, configure your operating hours, and paste a small piece of code into your website files. The real work begins after the code is live.
Your success depends on how your team manages the incoming messages. You must prioritize fast response times, honest communication, and clear escalation rules. A poorly managed chat box will harm your brand. A well-managed system will save sales, reduce support costs, and keep your customers happy.
If you follow the steps outlined above, you can turn a static webpage into an active conversation channel. Train your agents well, monitor your metrics, and adjust your routing rules as your company grows.